实现发货逻辑课后作业
Python向
在学习了如何通过零件实现发货逻辑后,就可以举一反三,完成下面的课后作业。
作业要求
- 阅读物品发货零件源码。
- 模仿物品发货零件,制作一个状态效果发货零件。
- 运行状态效果发货零件,测试效果。
操作步骤
1.阅读ItemShipPartMeta.py
python
@sunshine_class_meta
class ItemShipPartMeta(ShipBasePartMeta):
	CLASS_NAME = "ItemShipPart"
	PROPERTIES = {
		"itemList": PArray(text="给予物品列表", group="发货设置", sort=30, childAttribute=PDict(children={
			"itemDict": PCustom(
				sort=0,
				text="物品选择",
				editAttribute="MCItems",
				default=("minecraft:wooden_sword", 0),
				withNamespace=True,
				withAuxValue=True,
				isBlock=None,
			),
			"count": PInt(sort=1, text="物品数量", default=1)
		})),
}2.阅读ItemShipPart.py
python
@registerGenericClass("ItemShipPart")
class ItemShipPart(ShipBasePart):
	def __init__(self):
		ShipBasePart.__init__(self)
		# 零件名称
		self.name = "物品发货零件"
		self.itemList = [{'itemDict': ('bestmap:testItem1', 0), 'count': 1}]
		self.cmdType = 0
		self.cmdValue = 2001

	def CanAdd(self, parent):
		if not isinstance(parent, PlayerPreset):
			return "物品发货零件只能挂在玩家预设下"

	def SOnPlayerBrought(self, playerId, expireTime=-1.0, newBuy=False, orderTime=None):
		parent = self.GetParent()
		if not parent or parent.entityId != playerId:
			return
		for item in self.itemList:
			self.SpawnItemToPlayerInv({
				'newItemName': item['itemDict'][0],
				'newAuxValue': item['itemDict'][1],
				'count': item['count']
			}, playerId)
3.分析
可以看到ItemShipPartMeta.py元数据文件将物品列表作为一项配置暴露在编辑器的属性栏中,使得对应的数据成员itemList可以被可视化编辑,进而在SOnPlayerBrought玩家购买商品时将物品发放到玩家背包。
4.模仿
创建StatusEffectShip零件,继承自ShipBase。
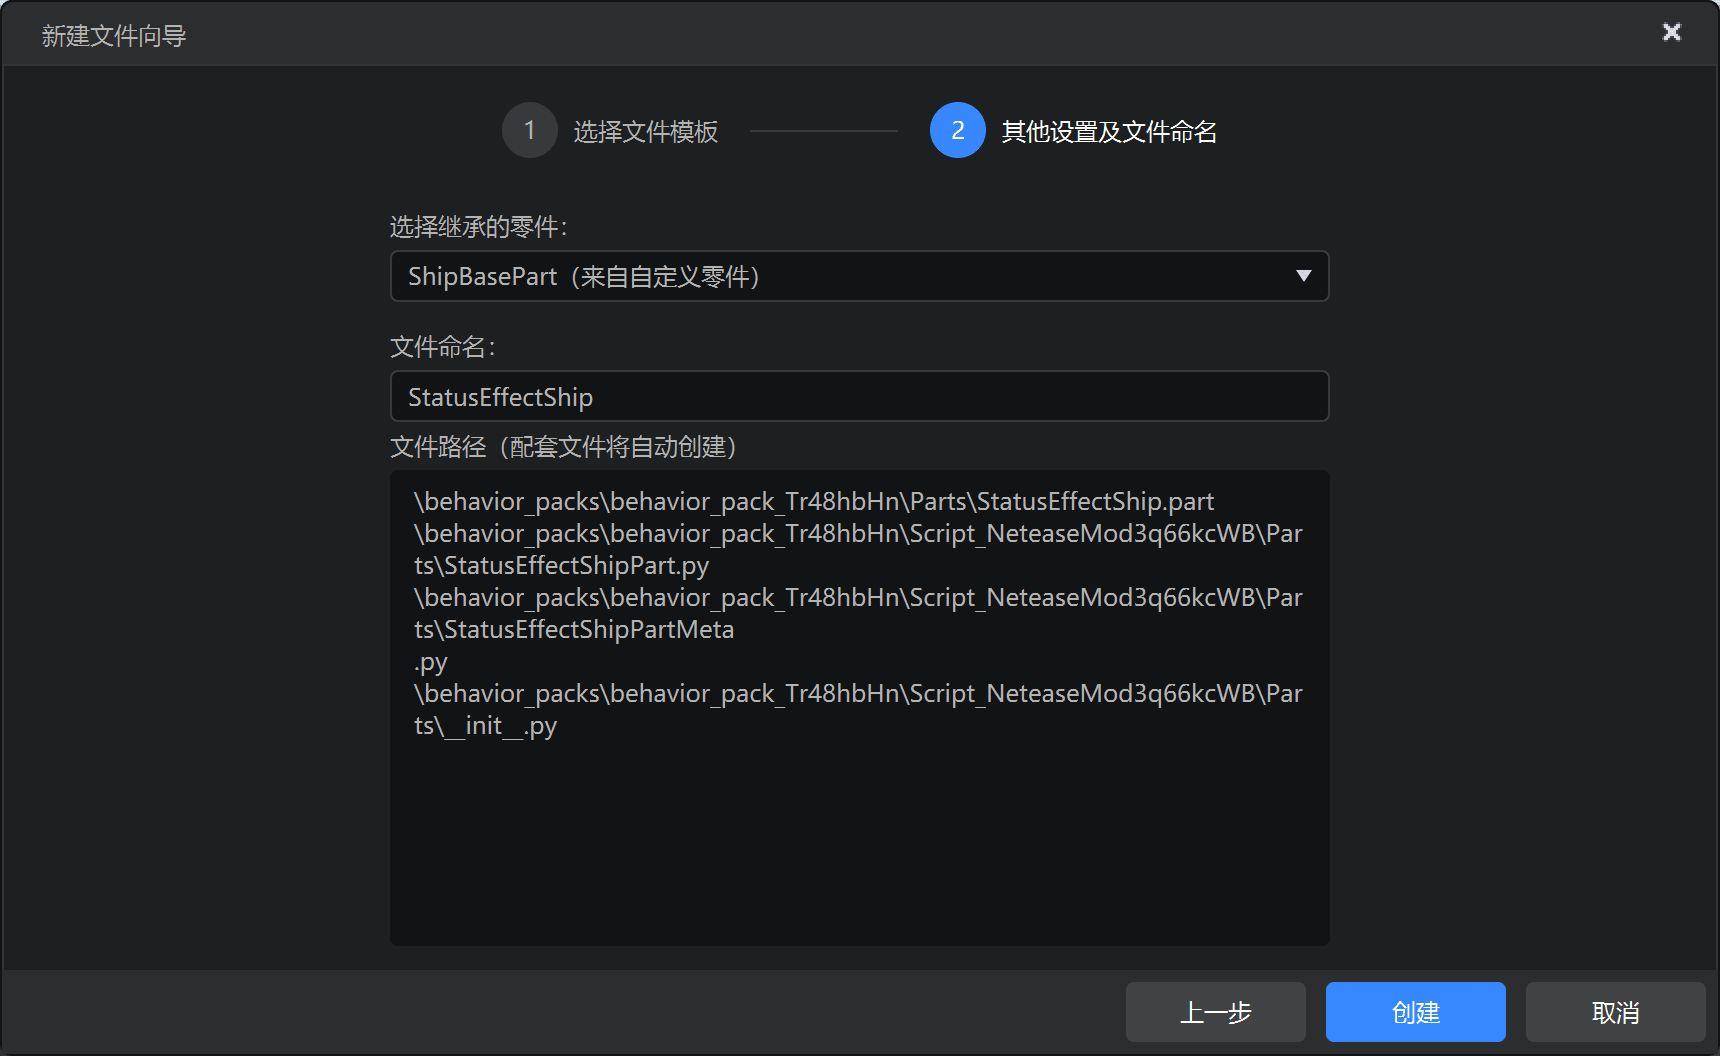
修改零件中文名称,和默认属性。
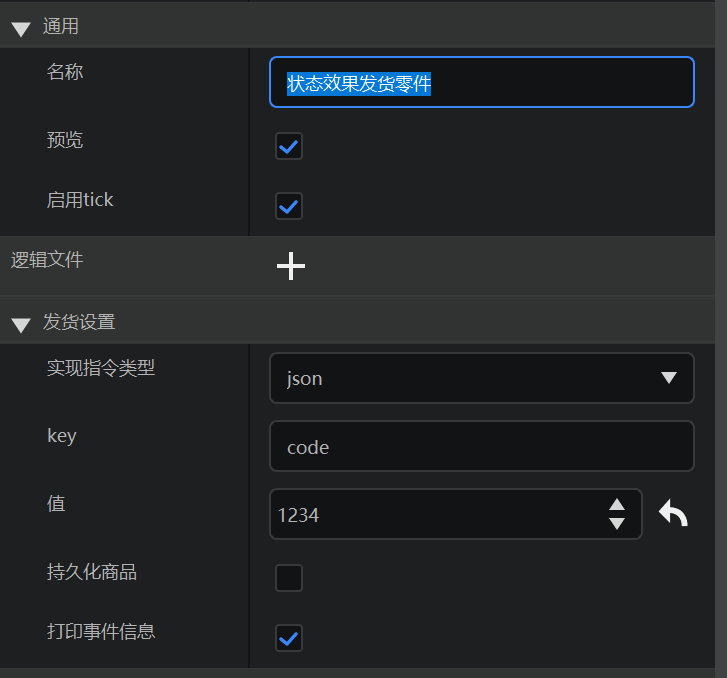
编辑元数据文件,主要注意sort建议30起步,group设为和父零件一样的“发货设置”
python
@sunshine_class_meta
class StatusEffectShipPartMeta(ShipBasePartMeta):
CLASS_NAME = "StatusEffectShipPart"
PROPERTIES = {
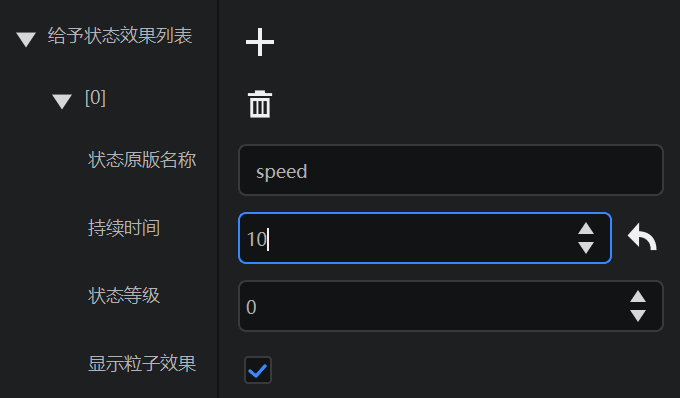
"effectList": PArray(sort=30, text="给予状态效果列表", group="发货设置", childAttribute=PDict(children={
"effectName": PStr(text="状态原版名称", sort=1, default="speed"),
"duration": PInt(text="持续时间", sort=2, default=1),
"amplifier": PInt(text="状态等级", sort=3, default=0),
"showParticles": PBool(text="显示粒子效果", sort=4, default=True)
})),
}编辑逻辑文件的__init__方法,添加名为effectList的成员。
python
def __init__(self):
    ShipBasePart.__init__(self)
    self.name = "状态效果发货零件"
    self.cmdValue = 1234
self.effectList = [] # 添加这个重写SOnPlayerBrought,然后遍历effectList,给玩家添加状态以发货。
python
def SOnPlayerBrought(self, playerId, expireTime=-1.0, newBuy=False, orderTime=None):
    parent = self.GetParent()
    if not parent or parent.entityId != playerId:
        return
	for effect in self.effectList:
		self.AddEffectToEntity(playerId, effect['effectName'], effect['duration'], effect['amplifier'], effect['showParticles'])
测试
1.挂载到玩家预设下,配置一个状态效果
2.修改OrderPollPart->ShipPlayer方中的测试数据,实现指令1234,填写和零件设置一样的值
python
		if self.debugMode:
			testData = {
                'entity': {
                    'orders': [
								{
									"order_id": 123456789,  # 订单id
									"timestamp": time.time(),  # 购买时间
									"cmd": '{"code":1234}',  # 实现指令
									"product_count": 1  # 购买数量。目前不允许一次购买多个,所以返回都是1
								},
							]
                }
            }
			callback(testData)
		else: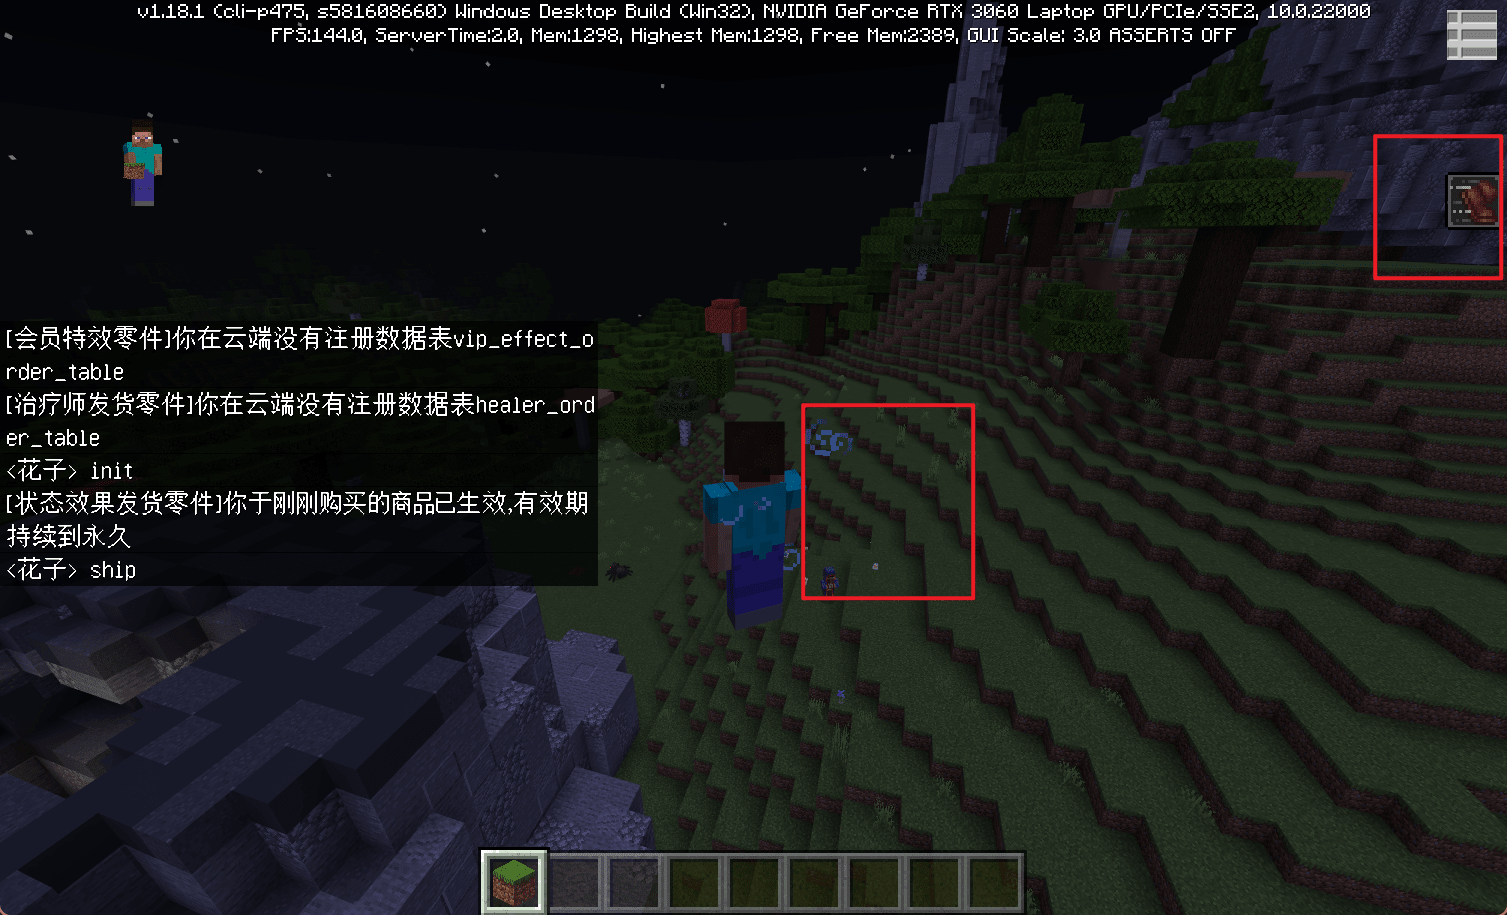
httpComp.QueryLobbyUserItem(callback, uid)3.进入游戏,聊天框敲入init和ship,观察效果
(蓝图版)实现发货逻辑课后作业
在第五章作业中,你设计了一个属于你的新职业,并独立完成制作。现在为你的新职业制作发货逻辑,并完成测试。