创建自定义实体
本页面镜像自 BedrockWiki
根据原始项目协议授权。本文经过AI翻译处理,如有内容遗漏,可以提交PR进行补充。
与自定义物品类似,我们也可以创建具有与游戏中原版实体相似机制的自定义实体。这些实体可以非常强大,允许你制作可繁殖驯养的动物,或是会攻击所见一切的敌对生物。
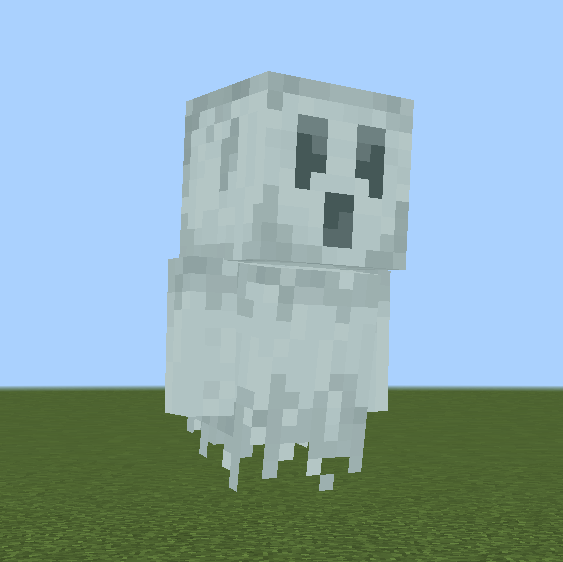
本文将创建一个幽灵实体,它会漂浮移动、攻击玩家,并在死亡时掉落我们之前制作的灵质物品。
和物品一样,实体由两部分组成:
- 视觉部分(纹理、名称、动画、音效)
- 行为部分(移动、攻击)
不同的是,我们需要为实体创建两个主文件:分别放在行为包(BP)和资源包(RP)中的 服务端 文件和 客户端 文件。此外还需要额外的文件来描述实体的几何模型和动画,这些将在后续章节中介绍。
首先我们将介绍如何创建实体并定义其行为,然后再添加视觉效果。
实体行为
与物品类似,我们需要一个文件来定义实体行为,通过标识符关联到具体的行为组件。这个文件的结构与物品行为文件非常相似,但包含更多组件。
我们在行为包的BP/entities/文件夹下创建服务端文件,命名为ghost.se.json。这里的.se代表 server entity (服务端实体),这是为了清晰起见,符合样式指南的推荐。
文件基本结构如下:
{
	"format_version": "1.16.0",
	"minecraft:entity": {
		"description": {...},
		"components": {...}
	}
}与物品文件类似,我们有格式版本标识,这里使用"minecraft:entity"表示这是实体文件。后续我们将不再赘述格式版本,建议直接使用示例中的版本。
实体在description部分包含更多信息:
"description": {
	"identifier": "wiki:ghost",
	"is_summonable": true,
	"is_spawnable": true,
	"is_experimental": false
}identifier键的作用与之前相同,用于标识这个实体。其他键决定了实体加入世界的方式:
is_summonable:是否可以通过/summon命令召唤is_spawnable:是否可以通过刷怪蛋或生成规则在世界中自然生成is_experimental:是否为实验性实体(如果是则只能添加到实验性世界)
建议保持这些设置不变,因为任何更改都会使你在游戏中测试实体变得更加困难。
组件
实体比物品拥有更多行为,因此需要定义更多组件。我们将这些组件分类并详细讲解。更多关于实体组件的信息,可以参考此页面。
基础属性组件
这些是每个实体通常都会具备的组件,定义了实体的核心属性。
"minecraft:type_family": {
	"family": ["ghost", "monster"]
},
"minecraft:health": {
	"value": 20,
	"max": 20
},
"minecraft:attack": {
	"damage": 3
},
"minecraft:movement": {
	"value": 0.2
},
"minecraft:collision_box": {
	"width": 1,
	"height": 2
},
"minecraft:loot": {
	"table": "loot_tables/entities/ghost.json"
},minecraft:health、minecraft:attack和minecraft:movement组件直接设置实体的生命值、攻击伤害和移动速度。实体的碰撞箱是它与方块或其他实体交互/碰撞的范围,由minecraft:collision_box定义,这个箱子会以实体为中心。
minecraft:type_family为实体添加家族标签。家族标签用于将相似类别的实体分组。例如monster包括僵尸、骷髅和苦力怕,这样我们就可以选择所有带有monster标签的实体。
minecraft:loot定义了实体死亡时掉落的战利品表路径。我们将在后续章节使用这个路径创建战利品表。
移动组件
为了让实体能够移动,我们需要定义两件事: 如何 移动和 可以 移动到哪里。这分别通过movement和navigation组件实现。
如果你希望实体能够移动,就必须包含movement和navigation组件。
"minecraft:physics": {},
"minecraft:jump.static": {},
"minecraft:movement.basic": {},
"minecraft:navigation.walk": {
	"can_walk": true,
	"avoid_sun": true,
	"can_pass_doors": true,
	"can_open_doors": true
}minecraft:physics用于给实体应用重力和碰撞。注意:你不能通过组件组来修改这个组件。 minecraft:jump.static允许你的实体跳跃以跨越障碍。这两个组件几乎用于所有实体。
有几种不同的移动组件允许不同类型的移动,例如海豚使用的minecraft:movement.swim、鹦鹉使用的minecraft:movement.fly和蜜蜂使用的minecraft:movement.hover。 minecraft:movement.basic组件允许我们的实体通过在地面上行走来移动。为了让实体看起来像是在漂浮,我们将使用几何模型。
导航组件是一个路径寻找器,定义了允许实体遵循的路径。例如骷髅会尽量避免走在阳光下,所以它们的路径规划会阻止它们选择阳光下的路径。此外,鹦鹉可以飞行,所以它们可以在空中移动,这与行走的生物不同。
这些组件有许多不同的设置,可以实现有趣的路径规划。我们选择的设置让幽灵可以在地面上行走,避免阳光直射,穿过门道并开门。
行为组件
虽然我们已经定义了实体 如何 做事情,但还没有定义 何时 或 做什么 。这就是.behavior组件的作用。这些组件定义了实体将执行的特定动作。 例如,村民会尝试繁殖,所以他们有minecraft:behavior.breed组件,而被驯服的狼会跟随主人,所以他们有minecraft:behavior.follow_owner组件。
我们希望幽灵能够闲逛和环顾四周,在玩家靠近时锁定目标并攻击。以下是使用的组件:
// 允许随机移动和环顾四周
"minecraft:behavior.random_stroll": {...},
"minecraft:behavior.random_look_around": {...},
"minecraft:behavior.look_at_player": {...},
// 允许锁定目标
"minecraft:behavior.hurt_by_target": {...},
"minecraft:behavior.nearest_attackable_target": {...},
// 允许攻击
"minecraft:behavior.delayed_attack": {...}第一个组件minecraft:behavior.random_stroll允许我们的实体定期选择一个附近的随机点进行移动。这个路径由我们的navigation组件创建,然后移动类型由movement组件定义。
接下来的两个组件允许实体随机环顾四周,并在玩家进入范围内时注视玩家。
为了攻击,实体需要一个target。minecraft:behavior.hurt_by_target和minecraft:behavior.nearest_attackable_target行为会使实体锁定任何伤害它的目标,并在范围内锁定最近的敌人。
最后,minecraft:behavior.delayed_attack是实体实际攻击目标的方式。
每个行为都有更多设置可以调整具体行为。
"minecraft:behavior.random_stroll": {
	"priority": 6,
	"speed_multiplier": 1
},
"minecraft:behavior.random_look_around": {
	"priority": 7
},
"minecraft:behavior.look_at_player": {
	"priority": 7,
	"look_distance": 6,
	"probability": 0.02
},
"minecraft:behavior.hurt_by_target": {
	"priority": 1
},
"minecraft:behavior.nearest_attackable_target": {
	"priority": 2,
	"within_radius": 25,
	"reselect_targets": true,
	"entity_types": [
		{
			"filters": {
				"any_of": [
					{
						"test": "is_family",
						"subject": "other",
						"value": "player"
					}
				]
			},
			"max_dist": 35
		}
	]
},
"minecraft:behavior.delayed_attack": {
	"priority": 0,
	"attack_once": false,
	"track_target": true,
	"require_complete_path": false,
	"random_stop_interval": 0,
	"reach_multiplier": 1.5,
	"speed_multiplier": 1,
	"attack_duration": 0.75,
	"hit_delay_pct": 0.5
}有关这些选项的更多详细信息,可以在官方文档bedrock.dev上阅读。
优先级
所有行为都包含一个"priority"字段。这个字段用于决定当多个行为可以运行时选择哪一个。
当实体选择要执行的动作时,它会从最低优先级到最高优先级搜索所有行为,并选择第一个可以执行的行为。因此,你需要将重要的行为(如minecraft:behavior.nearest_attackable_target)设置为比minecraft:behavior.look_at_player等行为更低的优先级。如果look_at_player行为的优先级较低,当玩家靠近时,实体总是会先执行这个行为,而永远不会攻击。
一般来说,重要行为的优先级为0或1。
完整实体服务端文件
完整的ghost.se.json
{
	"format_version": "1.16.0",
	"minecraft:entity": {
		"description": {
			"identifier": "wiki:ghost",
			"is_summonable": true,
			"is_spawnable": true,
			"is_experimental": false
		},
		"components": {
			"minecraft:type_family": {
				"family": ["ghost", "monster"]
			},
			"minecraft:health": {
				"value": 20,
				"max": 20
			},
			"minecraft:attack": {
				"damage": 3
			},
			"minecraft:movement": {
				"value": 0.2
			},
			"minecraft:collision_box": {
				"width": 1,
				"height": 2
			},
			"minecraft:loot": {
				"table": "loot_tables/entities/ghost.json"
			},
			"minecraft:physics": {},
			"minecraft:jump.static": {},
			"minecraft:movement.basic": {},
			"minecraft:navigation.walk": {
				"can_walk": true,
				"avoid_sun": true,
				"can_pass_doors": true,
				"can_open_doors": true
			},

			"minecraft:behavior.random_stroll": {
				"priority": 6,
				"speed_multiplier": 1
			},
			"minecraft:behavior.random_look_around": {
				"priority": 7
			},
			"minecraft:behavior.look_at_player": {
				"priority": 7,
				"look_distance": 6,
				"probability": 0.02
			},
			"minecraft:behavior.hurt_by_target": {
				"priority": 1
			},
			"minecraft:behavior.nearest_attackable_target": {
				"priority": 2,
				"within_radius": 25,
				"reselect_targets": true,
				"entity_types": [
					{
						"filters": {
							"any_of": [
								{
									"test": "is_family",
									"subject": "other",
									"value": "player"
								}
							]
						},
						"max_dist": 35
					}
				]
			},
			"minecraft:behavior.delayed_attack": {
				"priority": 0,
				"attack_once": false,
				"track_target": true,
				"require_complete_path": false,
				"random_stop_interval": 0,
				"reach_multiplier": 1.5,
				"speed_multiplier": 1,
				"attack_duration": 0.75,
				"hit_delay_pct": 0.5
			}
		}
	}
}
至此我们完成了实体行为文件。
更复杂的实体还可以有不同的_状态_,根据所处状态表现出不同行为。例如,野生的狼会自由走动,但被驯服后会跟随玩家。一个_事件_(被驯服)导致狼改变了_状态_。这个功能允许我们创建动态实体,在不同事件发生时执行不同动作。你可以在本指南中了解更多。
如果你现在打开世界并尝试用/summon wiki:ghost召唤实体,它的行为应该符合预期,但地面上只会显示一个影子。你可能还会看到它的名称显示为翻译键,就像我们的物品一样。
接下来我们将学习如何创建资源(客户端)文件,以及如何分配纹理、几何模型和动画。
实体资源
为实体添加视觉效果与物品截然不同。由于涉及更多组成部分,我们需要一个专门的文件来定义资源。这个文件称为实体_客户端文件_,我们将其命名为ghost.ce.json,存放在RP/entity/文件夹中。
本节将使用为幽灵实体创建的示例资源,演示如何将它们添加到实体中。在指南的下一节中,我们将介绍如何使用专业3D编辑器Blockbench创建自己的实体几何模型和动画。
模型
实体的"模型"即其形状,也称为"几何模型"。这描述了实体的外形,比如猪是由一个箱体和四条腿加头部组成,而鸡则有两条腿、一个头部和翅膀。几何模型以JSON格式存储在RP/models/entity/目录下,我们的文件将命名为ghost.geo.json。
这个文件由Blockbench自动生成,因此无需手动学习其语法。所以我们不会深入分析文件细节。它存储了模型中每个方块的数据,包括大小、位置和旋转等。
{
	"format_version": "1.12.0",
	"minecraft:geometry": [
		{
			"description": {
				"identifier": "geometry.ghost",
				"texture_width": 64,
				"texture_height": 64,
				"visible_bounds_width": 3,
				"visible_bounds_height": 3.5,
				"visible_bounds_offset": [0, 1.25, 0]
			},
			"bones": [
				{ "name": "root", "pivot": [0, 3, 0] },
				{
					"name": "body",
					"parent": "root",
					"pivot": [0, 4.625, 0],
					"cubes": [
						{
							"origin": [-4, 3, -4],
							"size": [8, 13, 8],
							"uv": [0, 20]
						}
					]
				},
				{
					"name": "leftArm",
					"parent": "body",
					"pivot": [4.6, 15.5, 0.5],
					"cubes": [
						{
							"origin": [4.1, 7, -1],
							"size": [3, 9, 3],
							"uv": [32, 32]
						}
					]
				},
				{
					"name": "rightArm",
					"parent": "body",
					"pivot": [-4.5, 15.5, 0.5],
					"cubes": [
						{
							"origin": [-7.1, 7, -1],
							"size": [3, 9, 3],
							"uv": [32, 20]
						}
					]
				},
				{
					"name": "head",
					"parent": "body",
					"pivot": [0, 16, 0],
					"cubes": [
						{
							"origin": [-5, 16, -5],
							"size": [10, 10, 10],
							"uv": [0, 0]
						}
					]
				}
			]
		}
	]
}我们需要的关键信息是identifier,这里为geometry.ghost,这将用于引用我们的几何模型文件。
纹理
现在实体有了形状,但还需要纹理。这个纹理也可以在Blockbench中创建,是一个简单的.png文件。
RP/textures/entity/ghost.png

你可能记得,在制作物品时,我们为纹理分配了一个短名称以便后续引用。我们将在实体文件中为实体纹理做类似操作,所以请确保记住纹理的文件路径。
动画
动画让我们的实体更具生命力,能够以不同方式移动。我们可以为实体创建任意数量的动画,还可以使用_动画控制器_在不同时间触发它们,这将在下一节介绍。
根据你的实体需求,可能需要不同的动画。我们的幽灵将有idle(待机)、attack(攻击)和move(移动)动画。这些文件同样由Blockbench自动生成,所以我们不会深入细节。
一个动画文件可以包含一个或多个动画。我们的所有动画将放在RP/animations/目录下的ghost.a.json文件中。
{
	"format_version": "1.8.0",
	"animations": {
		"animation.ghost.idle": {...},
		"animation.ghost.attack": {...},
		"animation.ghost.move": {...}
	}
}每个动画由键定义,所以这里我们的三个动画标识符是animation.ghost.idle、animation.ghost.attack和animation.ghost.move。
提示
如果一个实体有多个动画文件,考虑将它们合并到一个文件中,以保持文件夹结构清晰易读。 如果不合并,请确保在实体文件中引用动画时使用动画标识符,而不是文件名。
完整动画文件
{
	"format_version": "1.8.0",
	"animations": {
		"animation.ghost.idle": {
			"loop": true,
			"animation_length": 3,
			"bones": {
				"body": {
					"rotation": { "0.0": [10, 0, 0], "3.0": [10, 0, 0] },
					"position": {
						"0.0": [0, 0, 0],
						"1.5": [0, 1, 0],
						"3.0": [0, 0, 0]
					}
				},
				"leftArm": {
					"rotation": {
						"0.0": [-10, 0, 0],
						"1.5": [-5, 0, 0],
						"3.0": [-10, 0, 0]
					}
				},
				"rightArm": {
					"rotation": {
						"0.0": [-10, 0, 0],
						"1.5": [-5, 0, 0],
						"3.0": [-10, 0, 0]
					}
				},
				"head": {
					"rotation": {
						"0.0": [-7.5, 0, 0],
						"1.5": [-2.5, 0, 0],
						"3.0": [-7.5, 0, 0]
					}
				}
			}
		},
		"animation.ghost.attack": {
			"animation_length": 0.75,
			"bones": {
				"body": {
					"rotation": {
						"0.0": [10, 0, 0],
						"0.2917": [10, 15, 0],
						"0.5": [22.5, -12.5, 0],
						"0.75": [10, 0, 0]
					},
					"position": {
						"0.0": [0, 0, 0],
						"0.2917": [0, 0, 3],
						"0.5": [0, 0, -3],
						"0.75": [0, 0, 0]
					}
				},
				"leftArm": {
					"rotation": { "0.0": [-10, 0, 0], "0.75": [-10, 0, 0] }
				},
				"rightArm": {
					"rotation": {
						"0.0": [-10, 0, 0],
						"0.2083": [-10, 0, 0],
						"0.2917": [-10, 62.5, 117.5],
						"0.5": [-80, -17.5, 22.5],
						"0.75": [-10, 0, 0]
					}
				},
				"head": {
					"rotation": { "0.0": [-7.5, 0, 0], "0.75": [-7.5, 0, 0] }
				}
			}
		},
		"animation.ghost.move": {
			"loop": true,
			"animation_length": 1,
			"bones": {
				"body": {
					"rotation": {
						"0.0": [15, 0, 0],
						"0.25": [15, -2.5, 0],
						"0.5": [15, 0, 0],
						"0.75": [15, 2.5, 0],
						"1.0": [15, 0, 0]
					},
					"position": [0, 0, 0]
				},
				"leftArm": {
					"rotation": {
						"0.0": [15, 0, 0],
						"0.5": [20, 0, 0],
						"1.0": [15, 0, 0]
					}
				},
				"rightArm": {
					"rotation": {
						"0.0": [15, 0, 0],
						"0.5": [20, 0, 0],
						"1.0": [15, 0, 0]
					}
				},
				"head": {
					"rotation": {
						"0.0": [-12.5, 0, 0],
						"0.5": [-15, 0, 0],
						"1.0": [-12.5, 0, 0]
					}
				}
			}
		}
	}
}
动画控制器
有了动画,但实体还不知道何时播放它们。这时就需要动画控制器。这些控制器本质上_控制_动画的播放方式。 动画控制器由_状态_和状态间的_过渡_组成。这让我们可以在实体处于特定状态时播放特定动画,并在满足条件时在不同状态间切换。
例如,当实体移动时,切换到移动状态并播放move动画;或者当实体攻击时,切换到攻击状态播放attack动画。
让我们看看攻击动画控制器:
"controller.animation.ghost.attack": {
	"states": {
		"default": {
			"transitions": [
				{
					"attacking": "q.is_delayed_attacking"
				}
			]
		},
		"attacking": {
			"blend_transition": 0.2,
			"animations": ["attack"],
			"transitions": [
				{
					"default": "!q.is_delayed_attacking"
				}
			]
		}
	}
}可以看到有两个状态:default和attacking。实体初始处于default状态。
在transitions下,有一个条件,当为真时将转换实体到另一个状态。
{
	"attacking": "q.is_delayed_attacking"
}这里,attacking是要转换到的目标状态,q.is_delayed_attacking是触发转换的条件。 这个条件称为_查询_。这些查询可以告诉我们关于实体的信息,比如它是否正在攻击或移动。查询q.is_delayed_attacking会在实体执行攻击行为时返回true。
当实体处于attacking状态时,也有一个返回default状态的过渡。现在的条件是!q.is_delayed_attacking。这里的!表示_非_,所以它会返回q.is_delayed_attacking的相反结果(如果q.is_delayed_attacking返回true,那么!q.is_delayed_attacking返回false)。
这个状态还有animations。这些动画将在处于该状态时持续播放。注意这里我们使用的是动画的_短名称_,稍后将在实体文件中引用。如果不这样做,动画将不会播放。 还有blend_transition键,允许动画之间缓慢过渡融合。数值越大,过渡时间越长。
我们也可以为move和idle动画创建类似的控制器。
"controller.animation.ghost.walk": {
	"initial_state": "standing",
	"states": {
		"standing": {
			"blend_transition": 0.2,
			"animations": ["idle"],
			"transitions": [
				{
					"moving": "q.modified_move_speed > 0.1"
				}
			]
		},
		"moving": {
			"blend_transition": 0.2,
			"animations": ["move"],
			"transitions": [
				{
					"standing": "q.modified_move_speed < 0.1"
				}
			]
		}
	}
}
这遵循类似的模式,但有一些新增内容。 现在有了initial_state,告诉控制器从哪个状态开始。如果没有指定,则默认为default状态。 你还会注意到我们的查询有些不同。这里的查询q.modified_move_speed返回一个值,所以为了返回布尔值(即真或假),我们检查该值是否大于或小于0.1。有关动画控制器的更多详细信息,可以阅读这里。
现在有了动画控制器,我们可以将它们添加到动画控制器文件中。与动画类似,键是我们的动画控制器标识符:controller.animation.ghost.attack和controller.animation.ghost.walk。
我们的文件将命名为ghost.ac.json,放在RP/animation_controllers/目录下。
{
	"format_version": "1.12.0",
	"animation_controllers": {
		"controller.animation.ghost.attack": {
			"states": {
				"default": {
					"transitions": [
						{
							"attacking": "q.is_delayed_attacking"
						}
					]
				},
				"attacking": {
					"blend_transition": 0.2,
					"animations": ["attack"],
					"transitions": [
						{
							"default": "!q.is_delayed_attacking"
						}
					]
				}
			}
		},
		"controller.animation.ghost.walk": {
			"initial_state": "standing",
			"states": {
				"standing": {
					"blend_transition": 0.2,
					"animations": ["idle"],
					"transitions": [
						{
							"moving": "q.modified_move_speed > 0.1"
						}
					]
				},
				"moving": {
					"blend_transition": 0.2,
					"animations": ["move"],
					"transitions": [
						{
							"standing": "q.modified_move_speed < 0.1"
						}
					]
				}
			}
		}
	}
}
至此,我们已经创建了实体所需的所有资源。现在我们将创建实体文件。
实体客户端文件
客户端文件包含实体所有视觉组件的引用。 我们的客户端文件将放在RP/entity/目录下,命名为ghost.ce.json。这个文件的所有信息都在description键下。我们从熟悉的格式开始:
{
	"format_version": "1.10.0",
	"minecraft:client_entity": {
		"description": {
			"identifier": "wiki:ghost"
		}
	}
}
我们使用与行为文件相同的标识符,以指向正确的实体。
首先,我们需要在文件中定义实体的视觉效果,这样游戏就知道使用哪些模型和纹理。我们还需要为动画和动画控制器做同样的事。
渲染控制器
为了显示实体,它需要被_渲染_。为此,它需要材质、纹理和几何模型。我们已经创建了纹理和几何模型。材质定义了纹理如何显示。例如,骷髅使用材质实现透明度,末影人使用材质让眼睛发光。
由于我们的幽灵有一定透明度,我们需要一个能正确渲染这一效果的材质。幸运的是,Minecraft有许多预置材质可供使用,比如entity_alphatest就能满足我们的需求。你可以创建自己的材质,但要注意这非常复杂。如果有兴趣,可以从这里开始学习。
为了使用这些资源,我们需要用短名称定义对它们的引用。这与在item_texture.json文件中为物品所做的类似,只不过这里是在实体客户端文件中完成。以下是布局:
{
	"format_version": "1.10.0",
	"minecraft:client_entity": {
		"description": {
			"identifier": "wiki:ghost",
			"materials": {
				"default": "entity_alphatest"
			},
			"textures": {
				"default": "textures/entity/ghost"
			},
			"geometry": {
				"default": "geometry.ghost"
			}
		}
	}
}这里我们为每个资源类别分配了短名称default,确保使用正确的路径和标识符。我们可以定义多个这样的资源,但这属于更高级的内容。现在我们可以使用这些短名称来引用我们的资源。
为了让这些资源被渲染,我们需要告诉游戏要渲染哪些资源。这是通过_渲染控制器_实现的。控制器告诉游戏要为实体渲染哪个几何模型、材质和纹理,让我们能在游戏中看到它。
渲染控制器定义在单独的文件中,使用我们在实体文件中定义的短名称。 文件名为ghost.rc.json,位于RP/render_controllers/目录下:
{
	"format_version": "1.10.0",
	"render_controllers": {
		"controller.render.ghost": {
			"geometry": "geometry.default",
			"materials": [
				{
					"*": "material.default"
				}
			],
			"textures": ["texture.default"]
		}
	}
}这与动画控制器和动画文件的结构类似,我们的渲染控制器标识符是controller.render.ghost。 这告诉游戏渲染的资源应该是短名称为default的资源。渲染控制器还可以让你为模型的不同部分显示不同纹理或应用不同材质。在materials下,我们使用"*"表示将材质应用到模型中的所有_骨骼_(即模型中的每个方块)。有关渲染控制器的更多信息,可以查看此页面。
提示
如果保持短名称一致,你实际上可以为多个实体引用同一个渲染控制器。
现在要让你的实体使用这个渲染控制器,我们像这样将其添加到实体文件中:
"render_controllers": ["controller.render.ghost"]这样我们的实体文件应该如下所示:
{
	"format_version": "1.10.0",
	"minecraft:client_entity": {
		"description": {
			"identifier": "wiki:ghost",
			"materials": {
				"default": "entity_alphatest"
			},
			"textures": {
				"default": "textures/entity/ghost"
			},
			"geometry": {
				"default": "geometry.ghost"
			},
			"render_controllers": ["controller.render.ghost"]
		}
	}
}
现在如果我们将实体生成到世界中,应该能看到它了。
脚本
现在添加我们的动画。与其他资源一样,我们需要为它们定义短名称。注意,我们还需要为动画控制器定义短名称。
"animations": {
	"walk_controller": "controller.animation.ghost.walk",
	"attack_controller": "controller.animation.ghost.attack",
	"attack": "animation.ghost.attack",
	"idle": "animation.ghost.idle",
	"move": "animation.ghost.move"
}
你可能记得,这些是我们在动画控制器中使用的短名称;任何要在动画控制器中使用的动画,都必须在实体客户端文件中用短名称定义。
现在有了引用的动画和动画控制器,我们需要决定实体何时运行它们。这是通过scripts实现的:
"scripts": {
	"animate": [
		"walk_controller",
		"attack_controller"
	]
}这里,scripts告诉实体在特定时间执行特定动作。animate键会每tick运行任何引用的动画或控制器。这意味着每个tick我们的动画控制器都会检查是否要转换到新状态,并执行当前状态中的任何动画。
这样我们的动画应该能正确工作了。
刷怪蛋
完成实体客户端文件的最后一步是为我们的实体创建一个刷怪蛋。幸运的是,我们的文件可以通过spawn_egg键自动生成一个。
"spawn_egg": {
	"overlay_color": "#bdd1d1",
	"base_color": "#9fb3b3"
}这将生成一个使用时会召唤我们实体的刷怪蛋。它使用base_color和overlay_color中的十六进制代码为蛋着色。如果想要刷怪蛋有自定义图标,可以使用texture键并放入所需纹理的短名称。按照物品教程中的方法为物品定义纹理短名称。
"spawn_egg": {
	"texture": "texture_shortname"
}
至此,我们已经完成了实体客户端文件。
完整的ghost.ce.json
{
	"format_version": "1.10.0",
	"minecraft:client_entity": {
		"description": {
			"identifier": "wiki:ghost",
			"materials": {
				"default": "entity_alphatest"
			},
			"textures": {
				"default": "textures/entity/ghost"
			},
			"geometry": {
				"default": "geometry.ghost"
			},
			"scripts": {
				"animate": ["walk_controller", "attack_controller"]
			},
			"animations": {
				"walk_controller": "controller.animation.ghost.walk",
				"attack_controller": "controller.animation.ghost.attack",
				"attack": "animation.ghost.attack",
				"idle": "animation.ghost.idle",
				"move": "animation.ghost.move"
			},
			"spawn_egg": {
				"overlay_color": "#bdd1d1",
				"base_color": "#9fb3b3"
			},
			"render_controllers": ["controller.render.ghost"]
		}
	}
}
实体名称
最后一步是将实体名称添加到语言文件中。你可能还注意到,如果创建了刷怪蛋,它也会有一个名称的翻译键;我们也要添加这个。在en_US.lang中,确保为实体和实体刷怪蛋物品都添加了名称。它们应该类似这样:
entity.wiki:ghost.name=幽灵
item.spawn_egg.entity.wiki:ghost.name=幽灵
最终成果
完成!现在你的实体应该已经完整地出现在Minecraft中,包含所有行为和视觉效果,还有动画!你可以使用/summon命令召唤实体,或者在创造模式菜单中找到刷怪蛋。
你的文件夹结构应该如下所示:
完整的ghost.se.json
{
	"format_version": "1.16.0",
	"minecraft:entity": {
		"description": {
			"identifier": "wiki:ghost",
			"is_summonable": true,
			"is_spawnable": true,
			"is_experimental": false
		},
		"components": {
			"minecraft:type_family": {
				"family": ["ghost", "monster"]
			},
			"minecraft:health": {
				"value": 20,
				"max": 20
			},
			"minecraft:attack": {
				"damage": 3
			},
			"minecraft:movement": {
				"value": 0.2
			},
			"minecraft:collision_box": {
				"width": 1,
				"height": 2
			},
			"minecraft:loot": {
				"table": "loot_tables/entities/ghost.json"
			},
			"minecraft:physics": {},
			"minecraft:jump.static": {},
			"minecraft:movement.basic": {},
			"minecraft:navigation.walk": {
				"can_walk": true,
				"avoid_sun": true,
				"can_pass_doors": true,
				"can_open_doors": true
			},

			"minecraft:behavior.random_stroll": {
				"priority": 6,
				"speed_multiplier": 1
			},
			"minecraft:behavior.random_look_around": {
				"priority": 7
			},
			"minecraft:behavior.look_at_player": {
				"priority": 7,
				"look_distance": 6,
				"probability": 0.02
			},
			"minecraft:behavior.hurt_by_target": {
				"priority": 1
			},
			"minecraft:behavior.nearest_attackable_target": {
				"priority": 2,
				"within_radius": 25,
				"reselect_targets": true,
				"entity_types": [
					{
						"filters": {
							"any_of": [
								{
									"test": "is_family",
									"subject": "other",
									"value": "player"
								}
							]
						},
						"max_dist": 35
					}
				]
			},
			"minecraft:behavior.delayed_attack": {
				"priority": 0,
				"attack_once": false,
				"track_target": true,
				"require_complete_path": false,
				"random_stop_interval": 0,
				"reach_multiplier": 1.5,
				"speed_multiplier": 1,
				"attack_duration": 0.75,
				"hit_delay_pct": 0.5
			}
		}
	}
}
完整的ghost.ce.json
{
	"format_version": "1.10.0",
	"minecraft:client_entity": {
		"description": {
			"identifier": "wiki:ghost",
			"materials": {
				"default": "entity_alphatest"
			},
			"textures": {
				"default": "textures/entity/ghost"
			},
			"geometry": {
				"default": "geometry.ghost"
			},
			"scripts": {
				"animate": ["walk_controller", "attack_controller"]
			},
			"animations": {
				"walk_controller": "controller.animation.ghost.walk",
				"attack_controller": "controller.animation.ghost.attack",
				"attack": "animation.ghost.attack",
				"idle": "animation.ghost.idle",
				"move": "animation.ghost.move"
			},
			"spawn_egg": {
				"overlay_color": "#bdd1d1",
				"base_color": "#9fb3b3"
			},
			"render_controllers": ["controller.render.ghost"]
		}
	}
}
完整的ghost.geo.json
{
	"format_version": "1.12.0",
	"minecraft:geometry": [
		{
			"description": {
				"identifier": "geometry.ghost",
				"texture_width": 64,
				"texture_height": 64,
				"visible_bounds_width": 3,
				"visible_bounds_height": 3.5,
				"visible_bounds_offset": [0, 1.25, 0]
			},
			"bones": [
				{ "name": "root", "pivot": [0, 3, 0] },
				{
					"name": "body",
					"parent": "root",
					"pivot": [0, 4.625, 0],
					"cubes": [
						{
							"origin": [-4, 3, -4],
							"size": [8, 13, 8],
							"uv": [0, 20]
						}
					]
				},
				{
					"name": "leftArm",
					"parent": "body",
					"pivot": [4.6, 15.5, 0.5],
					"cubes": [
						{
							"origin": [4.1, 7, -1],
							"size": [3, 9, 3],
							"uv": [32, 32]
						}
					]
				},
				{
					"name": "rightArm",
					"parent": "body",
					"pivot": [-4.5, 15.5, 0.5],
					"cubes": [
						{
							"origin": [-7.1, 7, -1],
							"size": [3, 9, 3],
							"uv": [32, 20]
						}
					]
				},
				{
					"name": "head",
					"parent": "body",
					"pivot": [0, 16, 0],
					"cubes": [
						{
							"origin": [-5, 16, -5],
							"size": [10, 10, 10],
							"uv": [0, 0]
						}
					]
				}
			]
		}
	]
}
完整的ghost.a.json
{
	"format_version": "1.8.0",
	"animations": {
		"animation.ghost.idle": {
			"loop": true,
			"animation_length": 3,
			"bones": {
				"body": {
					"rotation": { "0.0": [10, 0, 0], "3.0": [10, 0, 0] },
					"position": {
						"0.0": [0, 0, 0],
						"1.5": [0, 1, 0],
						"3.0": [0, 0, 0]
					}
				},
				"leftArm": {
					"rotation": {
						"0.0": [-10, 0, 0],
						"1.5": [-5, 0, 0],
						"3.0": [-10, 0, 0]
					}
				},
				"rightArm": {
					"rotation": {
						"0.0": [-10, 0, 0],
						"1.5": [-5, 0, 0],
						"3.0": [-10, 0, 0]
					}
				},
				"head": {
					"rotation": {
						"0.0": [-7.5, 0, 0],
						"1.5": [-2.5, 0, 0],
						"3.0": [-7.5, 0, 0]
					}
				}
			}
		},
		"animation.ghost.attack": {
			"animation_length": 0.75,
			"bones": {
				"body": {
					"rotation": {
						"0.0": [10, 0, 0],
						"0.2917": [10, 15, 0],
						"0.5": [22.5, -12.5, 0],
						"0.75": [10, 0, 0]
					},
					"position": {
						"0.0": [0, 0, 0],
						"0.2917": [0, 0, 3],
						"0.5": [0, 0, -3],
						"0.75": [0, 0, 0]
					}
				},
				"leftArm": {
					"rotation": { "0.0": [-10, 0, 0], "0.75": [-10, 0, 0] }
				},
				"rightArm": {
					"rotation": {
						"0.0": [-10, 0, 0],
						"0.2083": [-10, 0, 0],
						"0.2917": [-10, 62.5, 117.5],
						"0.5": [-80, -17.5, 22.5],
						"0.75": [-10, 0, 0]
					}
				},
				"head": {
					"rotation": { "0.0": [-7.5, 0, 0], "0.75": [-7.5, 0, 0] }
				}
			}
		},
		"animation.ghost.move": {
			"loop": true,
			"animation_length": 1,
			"bones": {
				"body": {
					"rotation": {
						"0.0": [15, 0, 0],
						"0.25": [15, -2.5, 0],
						"0.5": [15, 0, 0],
						"0.75": [15, 2.5, 0],
						"1.0": [15, 0, 0]
					},
					"position": [0, 0, 0]
				},
				"leftArm": {
					"rotation": {
						"0.0": [15, 0, 0],
						"0.5": [20, 0, 0],
						"1.0": [15, 0, 0]
					}
				},
				"rightArm": {
					"rotation": {
						"0.0": [15, 0, 0],
						"0.5": [20, 0, 0],
						"1.0": [15, 0, 0]
					}
				},
				"head": {
					"rotation": {
						"0.0": [-12.5, 0, 0],
						"0.5": [-15, 0, 0],
						"1.0": [-12.5, 0, 0]
					}
				}
			}
		}
	}
}
完整的ghost.ac.json
{
	"format_version": "1.12.0",
	"animation_controllers": {
		"controller.animation.ghost.attack": {
			"states": {
				"default": {
					"transitions": [
						{
							"attacking": "q.is_delayed_attacking"
						}
					]
				},
				"attacking": {
					"blend_transition": 0.2,
					"animations": ["attack"],
					"transitions": [
						{
							"default": "!q.is_delayed_attacking"
						}
					]
				}
			}
		},
		"controller.animation.ghost.walk": {
			"initial_state": "standing",
			"states": {
				"standing": {
					"blend_transition": 0.2,
					"animations": ["idle"],
					"transitions": [
						{
							"moving": "q.modified_move_speed > 0.1"
						}
					]
				},
				"moving": {
					"blend_transition": 0.2,
					"animations": ["move"],
					"transitions": [
						{
							"standing": "q.modified_move_speed < 0.1"
						}
					]
				}
			}
		}
	}
}
完整的ghost.rc.json
{
	"format_version": "1.10.0",
	"render_controllers": {
		"controller.render.ghost": {
			"geometry": "geometry.default",
			"materials": [
				{
					"*": "material.default"
				}
			],
			"textures": ["texture.default"]
		}
	}
}